
Have you ever found yourself staring at a sheet of 100 items or more that need adding to a custom select list in Jira? If you have less than 100 entries, manually copying and pasting each into Jira is manageable. However, if you have over 100 entries to copy and paste this task quickly becomes endless and tedious. If you have over 1,000…well, that’s why you clicked on this article.
With these five steps, you can streamline this process by having the system automatically add the items from the list into the custom field.
1. Select an Issue to Use as The Import Mechanism
Start by selecting an issue to be used as the import mechanism. In this demonstration, we will use a project with the key ITSAMPLE and create a dummy task issue with the subject “import new field data,” identified by the key ITSAMPLE-23.
2. Format The List as a CSV
Once you have selected an issue for the import mechanism, it’s time to format the list in CSV format.
- The CSV format consists of items separated by commas. To convert a list into CSV format, you can copy the data into Excel or utilize tools (such as Linux commands) to insert a delimiter between the items. For instance, if you have a list in a text file named list structured like this:
one
two
three
- On a MAC pull up a terminal window and run the following commands (replacing ITSAMPLE-23 with the issue key in your system):
sed ‘s/$/, ITSAMPLE-23/;1s/^/New Field, Summary\n/’ file.list > file.csv
- This creates a file called csv that looks as follows:
New Field, Summary
one, ITSAMPLE-23
two, ITSAMPLE-23
three, ITSAMPLE-23
3. Import The CSV to Jira
- Now go to JIRA to import the CSV. Go to the “External System Import” page and choose “CSV.”
- Only a Jira system administrator can import the CSV file to Jira.
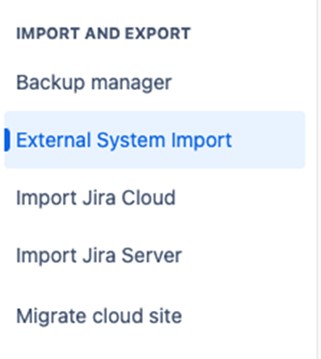
- To access the CSV file, click the “COG” icon and select “system”.
- Now, “External System Import” will appear on the left-hand panel. Click on it and then select the “CSV” icon.
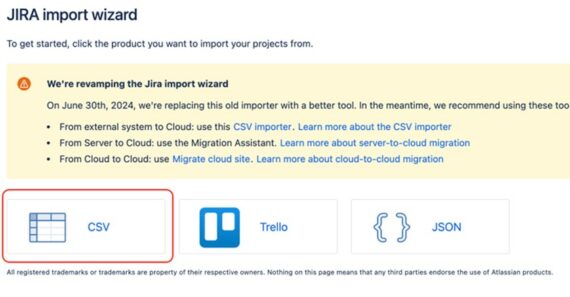
- Browse to the newly created file.csv and select “Next”.
4. Use The Import Mechanism
Select a project for the import mechanism and a date format if the data is the date/time criteria and select “Next”.
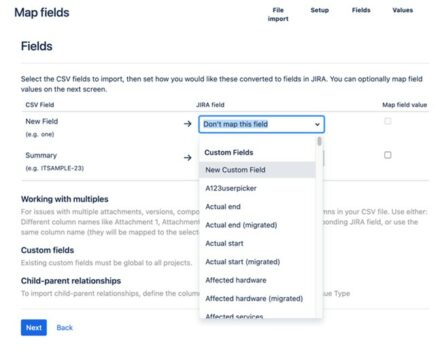
5. Map The Fields
From here, you will map the fields. Summary → Summary. If you haven’t created the new custom field yet you can do it here, by changing “Don’t map this field” to “New Custom Field”. If you have already created it, change it to the new field.
A new screen will pop up to create the new field. Choose the “name” and “type” of the field:
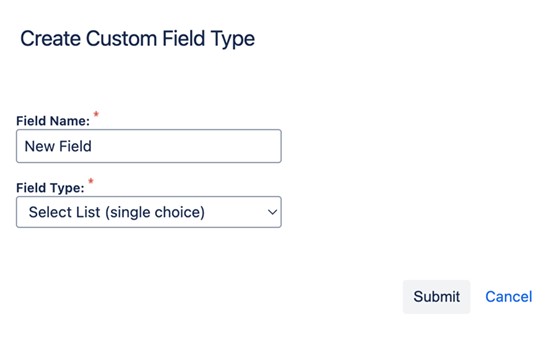
Select “Next” and then select “Begin Import”
Once completed, verify that the custom field values have been successfully created on the “Custom Field” page. Then remove any unnecessary dummy issues from your system after completion.
For more detailed instructions or specific examples related to a CSV import, refer to Importing data from CSV. To learn more about how Forty8Fifty Labs can help you schedule a consultation.
Related Posts:
Creating a Scaled Agile Hierarchy within Jira
6 Steps to Plan Your Atlassian Cloud Migration


